Monday, November 11, 2013

"Thor: The Dark World" Inspired Makeup

So last Friday night I saw "Thor: The Dark World" and before going to see it I thought it would be fun to do makeup inspired by the Movie.  The image I based my look off of is this one:
I knew I wanted red as the transition with grey on the center lid and black on the inner/out corners.  I ended up with something a bit different than what I had intended but loved what I came up with.  Now that I've seen the movie I have an idea for another look so maybe that one I'll do the darker out edges - but we'll see.

Now, this blogpost is different than the past for a few reasons.  One being I took photos as I went about doing my makeup and I also found probably the best way I can utilize my phone to take photos.  And you'll see as the photos progress I get better with the lighting.  I used a mirror similar this to improve my photo quality/give truer colors to my look:
At first I was using my back facing camera and had it towards me and used the mirror's reflection to get what I wanted in the frame.  The colors were more true this way compared to my last few makeup posts but not quite there.  Then at one point I tried using the same camera but instead took a picture of my actual reflection.  This way I was closer to light and the colors were more true.  I still prefer this look in person but I was very pleased that I was able to figure out a better way of getting the colors/blending to show up better in photos.  I even got a compliment from a friend on Facebook about it!!  So that was neat.  So let's get on with the look.

Here is the completed look (I love my glow in the dark Avengers shirt - little boy's section of Wal-Mart).
See the "eclipse" in my eyes?  Yeah..that's the reflection of the light in my eyes.  Yet this photo is a reflection of my eyes in the mirror...reflectception?
First I filled in my eyebrows (slightly .. I still haven't gone in on the bold brow trend) with "Hazelnut".  I then put Pro Longwear Concealer all over my lid and up to my brow as an eye shadow base.  Since I don't have a red eyeshadow I improvised a bit.  A few months ago in my IPSY bag I received a Cailyn Tinted Lip Balm in the color "Big Apple" so I applied it in my crease and blended it out with a tapered brush.  I built up the color until I was satisfied.  These first two photos are a few layers of blending.  
Here are photos of the product and brush I used along with more of the lip balm on in my crease before blending.
Bam.  It's all blended.
For the rest of the look I used "Virgin" (far left), "Creep" (second from right) and "Gunmetal" (far right) for the Urban Decay Naked Palette. (Um..I saw photos of Naked3 and holy crap.  Pleas please please please Santa Clause..PLEASE.  Oh I still would love Naked2, Vice 2, and the Shattered Face Case.)
With a flat shader brush I applied Gunmetal all over the lid, not going into the crease.
With a blending brush I blended that all together with Creep.
And just like with the lip balm I built up the color.  Start off with a little on the brush, work it in and then when needed pick up more color with your brush .. repeat until you get it as dark as you want.
My eyes so far at this point:

At this point I stopped with my eyes (oh and I totally was winning tonight because I had NO FALLOUT).  When you're careful you don't need to clean up and sometimes I clean up my line and make a straight edge on my outer corners but with this one I wanted to keep it "blown out".  At this point I applied my Mineralize Moisture Foundation all over with a stippling brush.  And I meant to get a photo of this next part but totally forgot!  But the left photo below shows what it looks like afterward.  I applied the Mac Prep+Prime Highlighter Pen in "Bright Forecast".  I put this on as a triangle shape beneath my eye.  One edge of the triangle goes down the side of my nose, one edge is parallel to my eye and the third edge is the diagonal connecting the two lines.  I blended it out with a small tapered stippling brush.  The photo on the right [slightly] shows where I put my Pro Longwear Concealer to continue to conceal my under eye area.  Putting concealer all over down there doesn't totally help because while you're covering the dark parts you're also highlighting them as well.  (Thanks to Wayne Goss for that tip!)  And along with Christian's (my main dude at the local Mac store) advice I built up the concealer little by littler until I was satisfied.  I used a very very very very very small concealer brush to place it and blend it out.  I also used my foundation stippling brush to blend when needed.  And then set all of that with Bare Minerals Veil.
After I completed the rest of my face makeup (which is listed below) I applied a black pencil liner to my tight line and waterline.

Following that I applied Gunmetal with a pencil brush to smoke it out and I also put Creep right on the liner with a small angled brush.
With a black liquid liner I very subtly lined my top lash line:
For mascara I used Tarte's "Lights, Camera, Flashes Statement Mascara" and I also placed Virgin as my brow highlight and inner corner.
For the rest of my face I set my foundation with Mac's Mineralize Foundation/Loose; contoured with Mac's Bronzing Powder by placing it in the hallow of my cheeks, beneath my jaw and then around my hairline; put Mac's "Springsheen" on the apple of my cheeks and for an extra glowy highlight I put Lustre Drops in "Sun Rush" on my cheekbone starting about the outer third of my eye and curved up to about the midline of my eye.  I made sure to blend it all out so it didn't look all gross and stuff. 
 
For my lips I grabbed a random lipgloss that I got in one of my IPSY bags.
Aww..Thor makes me happy.

Wednesday, November 6, 2013

Gunmetal Smokey Eye

So..welcome..this is what I did...
I used the Urban Decay Mariposa Palette for this look and actually did something different with my top liner.  It's something that has taken a few years (for me) to get a hang of.  But really I think a lot of people I know have been able to do it easily.

My Eyes:
  1. Apply Mac Pro Longwear Concealer as an eye shadow base.
  2. With a fluffy brush and "Money" apply to the upper crease.
  3. With a more dense blending brush apply "Mushroom" to the crease.
  4. With a flat shader brush pack on "Gunmetal" all over the lid and do not go into the crease.
  5. With the brush with "Mushroom" blend out the edges of "Gunmetal".
  6. Apply a black pencil eyeliner to the top lid (the part I finally was able to do without looking like crap) and smudge it and blend into "Gunmetal" with "Creep" from the first Naked Palette (second from right).
  7. Tight line with a black pencil liner and also add it to the bottom lash line.
  8. Slightly blend out the bottom lash line with "Creep" with a pencil brush.
  9. Put Virgin from the Naked Palette (first from left) in the inner corners and highlight.
  10. For mascara I used my Tarte "Lights, Camera, Flashes Statement Mascara".  I got this in my most recent Glossybox and it's funny when I first saw it in stores I hated the packaging and had no interest in trying it for that reason, it seemed so bulky.  BUTOHMY.  I have super thin and "fragile" lashes and it works so well to to make them pop.  I seriously love this mascara.  Thank you Glossybox!!

My Face:
  1. Apply Mac's Mineralize Moisture Foundation all over with a stippling brush.
  2. Concealed under the eyes with Mac's Pro Longwear Concealer.
  3. Set the under eye make up with Milani's "Multitasker" Face Powder
  4. Bronze/contour the face by adding Mac's Bronzing Powder to the hallow of the cheeks, under the jaw, around the hairline and on the sides of the nose.
  5. For blush use Mac's "Blush All Day".
  6. For a highlight above the blush and cupid's bow use Bare Minerals Veil and for the nose, chin and forehead highlight use Mary Kay's Facial Highlighting Pen
  7. Powder the rest of the with the Mac Mineralize Foundation/Loose.
For my lips I threw on Estee Lauder's Pure Color Gloss in "Impulsive Coral Shimmer".

Tuesday, October 29, 2013

Mermaid Makeup

For Halloween this year Peytyn and I are going to be mermaids!  I had a few other ideas at first but after watching a few YouTube videos I changed my mind.  Brittany and Chrisspy both did tutorials for mermaids and love them so much and inspired my makeup for Halloween.  Here are the videos:
I didn't necessarily follow these videos when I was practicing my makeup .. it had been a week since I had watched them but I knew the general idea of what I wanted to do based off of what Brittany and Chrisspy did.  I did one practice look and then a "real" look that I actually wore out.  But for Halloween I plan on doing things differently again but want to share what I've done so far.  It really won't change too much I just want to add more glitter/sequin/color detail around my face, neck and collar.

This is what happened when I first tried out my mermaid makeup:

For the first time practicing this I used different shades of green and blue to create a smokey eye and to contour.  I have this random glitter (I literally have no clue where it came from) that I applied wherever I contoured.  I applied it with eyelash adhesive and it wasn't that much fun getting off later but my eye makeup remover made it much easier.  I would like to use the glitter again for Halloween but would like to make more of gradient so the transition looks smoother and not so harsh.

Now for when I did this a second time I didn't use any glitter at all.  I wanted to concentrate more on contouring with the blue/green eye shadow.  I used an E.L.F. palette the first time I practiced and it looked nice but the colors rubbed off easily and made it hard to add color around my face.  The pictures below are what I for sure will do again for Thursday and I'll share what I used for each step.
Urban Decay Deluxe Shadow Box
Urban Decay Ammo Palette

My Eyes:
  1. Apply Mac Pro Longwear Concealer as an eye shadow base.
  2. With a flat shader brush apply "Peace" all over the lid.
  3. With a fluffy brush apply "Graffiti" to the crease and blend out the edges.
  4. Apply "Polyester Bride" to the center of the lid to brighten and also on the brow highlight.
  5. With my smudger brush apply "Peace" to the lower lash line.  Connect the outer and inner bottom lash line to the lid color.
  6. Apply NYX Jumbo Eye Pencil in "Milk" to the waterline.
  7. Apply liquid liner to the top lashes, mascara and the Sorceress eyelashes that are pictured below (I bought mine at Wal-Mart).

And bam now time to do the face. 
My Face:
  1. First I applied my Matte-Wear Liquid Foundation all over with a stippling brush.
  2. Concealed my under eyes with my Mac Pro Longwear Concealer.
  3. I set my under eye make up with my Bare Minerals Veil
  4. I bronze up my face by adding Mac's Bronzing Powder to the hallow of my cheeks and around my hairline.  Since I'm going in with colors to contour as well I just did enough bronzer to help add dimension.
  5. I put a little bit of Mac's "Blush All Day" on my cheeks to add in a bit of color that was more natural.
  6. I then powder the rest of my face with the Mac Mineralize Foundation/Loose.
  7. I then start to contour more harshly with "Peace" by adding it along my hairline, the hallow of my cheeks, along my nose and under my chin.  I first added some color then would blend it out and then add more to darker the color.  I would add more color closer to my hairline and blend down and then on the lower part of my cheeks and blend that up.
  8. I added "Graffiti" to the darker portion of the contours.
  9. I highlighted my forehead, nose, cheeks, chin and cupid's bow with "Polyester Bride".

This time for the makeup I did not use any glitter but just sequins in sporadic chunks on my face.  Next time I would add more color contour and use some glitter and sequins.  I liked how this turned out this time but feel like it could've been more complete.
For mermaid long hair I put in my 220G 22inch Bellami Hair Extensions in the color "Chestnut" and curled all over my hair.
For a hair accessory I made this beaded hair clip with a pendent on the bottom chain.  Yeah..this picture sucks.  I'll get better photos on Halloween and post them then.
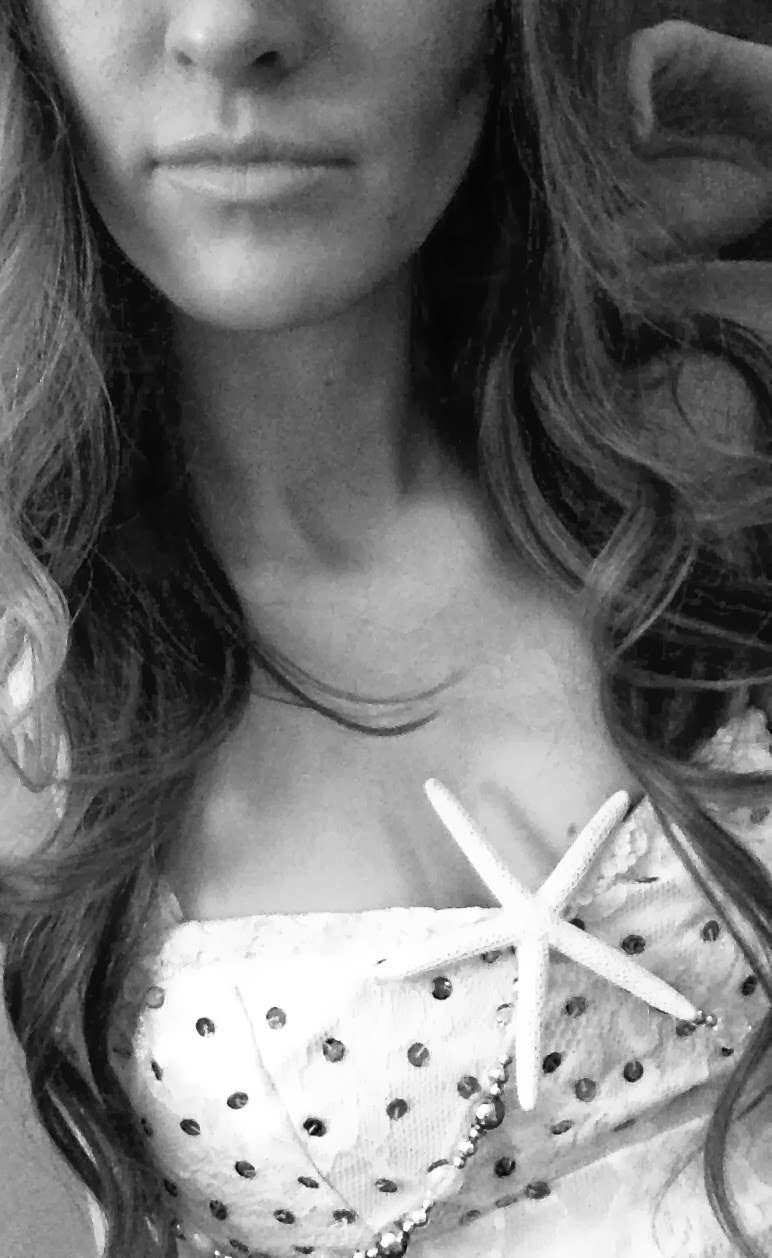
For my costume I made little bra top with material left over from the items I made for my friend Courtney's wedding.  It's a cream base fabric with matching lace to go over.  I felt like this was pretty and could resemble scales almost.  Again, I don't have the best photos of my outfit let's say it turned out pretty cool.  I had different intentions of what to make but I like how it all turned out.  My mom was so awesome and added sequins to the top part of my outfit and had the idea of adding the same strand of beads as my headpiece to shape my boobs.  I also bought some starfish with the intention of putting them in my hair like Chrisspy did but instead I wanted it on my top to really pull the outfit together.  I also made straps out of lace that can be worn a few different ways.  The fabric can be gathered all at the top, fanned out or hang off the shoulder.  My skirt is a green to blue ombre fabric and I wrapped it around and had it tie to the side. 

Now here are some selfies and remember to check back after Halloween to see more photos of and some actual good ones.
For my hair I wore my Bellami Hair Extensions (22inch Chestnut).


Tuesday, October 22, 2013

Current Night Routine

Yeah buddy..two for two!  Since I started slipping on doing blogposts I decided to have dedicated posts that I'll do at least weekly so that way I can stay consistent with all of this.  I"ll still post my random posts sporadically but I feel like doing a weekly thing will help keep my random posts more frequent.  So on Tuesdays expect something beauty related to check out.  I even have a calendar planned out all the way until February..so this is gonna happen.  Every other week will be some sort of makeup application post.  I guess technically it's a tutorial but remember, I'm just an enthusiast.  I do have an extended blogpost set for Thursday for more background on that and where I'm heading with it.  And then every other week it will be makeup related but more broad and you'll see what I mean as time goes on.

So anyways today I'm talking about my night routine.  This has changed over the years as I try different products and it may change as time goes on.  I've been using a new skin care system lately and so far so good with it but I also want to try out a few other products from this company as well.  But for now I'll share what I'm doing currently and I'll share what I would like to try.

On work nights the first thing I do to get ready for bed is take a shower.  I'll shower in the mornings sporadically for work but I just really love going to bed all clean - it feels really refreshing.  But for the weekends when I don't have to be up super early I prefer to start my day off with a shower.

After my shower I typically have raccoon eyes that are just gross so I take my Mary Kay Oil Free Eye Makeup Remover to remove any makeup I have left on.  I love this makeup remover because it works super well and it doesn't irritate my eyes at all.  If this is a night that I don't take a shower I prefer to use a makeup wipe (wipes are probably the best thing ever created). Out of the three different wipes I've tried so far I like Maybelline Clean Express Deep Cleansing Towelettes the most.  These are large and WET.  I couldn't stand how dry the Mac and Neutrogena wipes got.  I would even store them upside down and that would help but the last few were like..not that wet.  If a wipe feels dry I feel like it's not doing its job fully.  Especially since I now know how amazing the Maybelline wipes are.  Plus if you get home late and don't have enough energy to do your full night routine all you need to do is go brush your teeth and grab a wipe and as you walk to your bed and lay down clean away.  Yes, I have done this before.

In the past for my cleanser I have used Proactiv which I liked and it did what I wanted to do but honestly it's a bit harsh on the skin.  The beads in the cleanser made sense but were rough and after washing my face I felt dried out and a little raw.  So now I'm using the TimeWise 3-In-1 Cleanser (normal/dry skin).  I've tried this product out about four times in the past three years and have liked it each time - this also has the beads in it but it's so much more creamy.  I've been using it consistently for a few weeks now and I do like how it keeps my skin feeling clean and I can tell the difference in using this product.  One night I did use the TimeWise 3-In-1 Cleanser for oily/combination skin just for kicks - I can't give a full review on this since I don't have oily skin and I only used it once.

Following the cleanser I use my Night Solution and you can't forget to moisturize and for that I use the TimeWise Age-Fighting Moisturizer (dry/normal).  I always thought it was weird in the past when I was using "age-fighting" products.  Dude..I'm young!  But why wait for a problem to exist and then correct it?

While I wait for my skin to dry from washing and as I let the Night Solution set I do a few things in between.  The first thing I do after washing my face is apply my Artistry Essentials Replenishing Eye Creme.  I got this eye creme a few months ago and I haven't used it consistently enough to know if it works or not.  My bad.  I have been better about including it into my routine and this is important to me because I have dark circles that I would prefer to not have to spend so much time covering up when I do my makeup.  Once I get through this product I'll give a full review at that point.

After applying my Night Solution I go back to my eyes and apply my Lash & Brow Building Serum.  I've had this product for a long time now but again, I haven't used it consistently enough to know if it works or not.  When I was in high school I used RevitaLash which I loooooooved and I know it works based off my experience but it's pretty expensive.  I have small, sparse and thin lashes, I know how to coat on the mascara but it's nice to have a good base to start with.  So we'll see how this new one turns out and I'm hoping for the best since it's a much better price.

I'm interested in trying out the Botanical Effects Cleanser because I have a sample of the Botanical Effects Mask and was very happy with the result after once use.  My skin isn't too bad when it comes to acne but I do have some problem areas. My cheeks get blemishes and I have blackheads on my chin under my lip.  My chin isn't that noticeable but it's still gross and I was happy with how the mask cleared this up.  It reminded me of the Proactiv I used to use but again not so harsh.  I only use a face mask 1-2 times a week, not every night.

Now that my face is all clean and set my teeth need some attention.  Flossing and brushing is a definite must.  I have a DiamondClean sonic toothbrush.  There is such a major difference between an electric toothbrush and a manual.  You really don't know what clean is until you use an electric toothbrush.  And to keep my teeth straight I have that good ole retainer.  I had Invisalign for about five months last year and that helped me stick with my retainer this time around (yeah..I had braces before and didn't wear my retainer) because I was already used to wearing a retainer almost 24/7.

And then I get all snuggly in my bed and go to sleep.  Good night.

Tuesday, October 15, 2013

Ransom Smokey Eye

Before I get into this blogpost I just need to say I am a makeup enthusiast .. All my makeup knowledge is from watching YouTube videos for the past 3+ years and I've grown a good collection of makeup for the average girl.  It's nothing too crazy, really but once you get to the point of having a few different foundations you wear depending on the look you want .. it's a collection.  I have a few Mac foundations and a few MaryKay and I like each of them but again, I wear each one depending on how I'm doing the rest of my makeup.

Also .. these photos were taken with my phone so they're not as great as if I were to have a professional camera and although when I look at the photos today I'm pleased but I remember being disappointed when I initially took the photos - the makeup looked better in person.  I do have another camera I could potentially try out next time.  Plus I wish I went outside instead of just being next to a window.  It would've been the perfect day/time to take photos outside.
 
Anyways here is a before and after of the makeup I did last weekend.  I didn't have anywhere to go, in fact I was home all weekend with a sick baby but when she was taking a bath I thought it would be fun to experiment with  my makeup - if it turned out totally awful at least I didn't have to redo my makeup before leaving the house.  I was quite pleased with how it turned out, however I already know how to make it better for next time.
I really can't say I can think of a photo of myself posted anywhere without any makeup at all.  So that's what I look like in case you were wondering. Ha.  On a day to day basis I try to do my makeup not so cray cray and more with browns and tans for my eyeshadow.  And even though my foundation might vary the bronzer/blush typically stays the same.  I have a few different highlighters and concealers but mostly stick with what I'll share in this post.
 
I knew that I wanted to a smokey eye and this is a very similar look I did for Courtney's bachelorette party (I posted it on my Instagram back in September & that look was brighter on the inner corners and I used a teal blue as the transition).  Below I'm going to list the products I used and how I created this look and at the end of the post will be close ups of my eyeballs.
 
I first filled in my eyebrows with my Anastasia Beverly Hills Go Brow Kit (in medium brown).  I like this kit because it's simple and I really just started filling in my eyebrows this past year.  Plus it's small and I wanted to try it out before committing to buying things for my eyebrows.  I was never really a fan before of filling them in but if you're going to go all out on your makeup for a look like this, your eyebrows need to be done.  Especially since mine are already so light. (With that said, the photos make it appear like I didn't touch them .. for photos I should fill them in darker to have a better balance but when I did it .. didn't look so great.  Good thing I took enough photos before messing them up!)
 
I then primed my eyes with Urban Decay's Primer Potion sometimes I use my concealer for this step and it's *mostly* random what product I use for that.  I did use my Mac Prolong Wear Concealer to carve out the bottom portion of my brow.  I knew I wanted to put a very light color for my highlight so that's why I wanted to use my concealer, I feel like it shows lighter colors better.
 
My eyeshadows for this look came from Urban Decay's Deluxe Shadow Box (I see this at Nordstrom Rack all the time and it's a great price!!) and the first Naked Palette.  Refer back to these photos to see the shadows I used.
 
Urban Decay Deluxe Shadow Box
Urban Decay Naked Palette
Eye Makeup Steps:

  1. Applied "Virgin" (Far left shadow from the Naked Palette) to my brow bone for my highlight.
  2. Applied "Naked" (Third from left from the Naked Palette) with a big fluffy brush above my crease and slightly blended into my brow bone.
  3. Applied "Ransom" (Top right corner of the Deluxe Shadow Box) with a fluffy brush into my crease.
  4. Applied "Zero" (Center of Deluxe Shadow Box) with a flat shadow brush and packed that on all over my lid NOT going into my crease.  Because of my eye shape, next time I would stop Zero sooner because when I blended it out into Ransom it was darker than I had intended.
  5. Using a blending brush I blended Zero into Ransom and in my opinion, blending is the most important thing when doing any eye look. 
  6. I lined my waterline and tight line with Urban Decay's 24/7 Glide-On Eye Pencil in "Zero".
  7. I put Ransom on a small brush and blended that on my bottom lash line and then I put my Zero eyeshadow closer to my lash line and blended that all out.
  8. I used my E.L.F. black liquid liner to line my top eyelid but I did not wing it out.  I love the way that it looks winged out but..I feel like there are some YouTubers that I watch that do it every single time and .. no.  Let's mix it up. 
  9. I applied a coat of mascara to my lashes and place my Ardell "Wispies" on top.  I seriously love these lashes.  
  10. The last thing I did was add more Virgin to the inner corners of my eyes to help brighten them up.
This photo is with my eyes *mostly* completed (no false lashes yet).  I also have my foundation on but nothing else.  In my first step below I describe cleaning up the edges of my eyeshadow so take a look at my bottom eyeshadow and see how as it goes up and meets my eyeshadow on top, well, it's straight instead of "blown out".  Hopefully this photo helps with my description below.
 
Face Makeup Steps:
  1. I first used some makeup remover on a Q-Tip to remove any fall out from my eyeshadow and to create a solid line on the outer edges of my eyeshadow.  Cora (from YouTube) gave a great tip in a video recently and that was to start the Q-Tip at the top and bring it down.  It really makes a difference compared to going in the upward motion.  I don't always make the edges of my eye shadow straight like this.  Most of the time I leave it "blown out" depending on the look I'm going for.  
  2. Since I have such a dramatic, night eye look going on I typically prefer a matte foundation - I save the dewey look for my lighter eye looks or for during the day - I used my MaryKay TimeWise Matte-Wear Liquid Foundation. I blended that all over my face with a stippling brush.
  3. I used my Mac Prolong Wear Concealer again for underneath my eyes and here's a tip that Christian (from the Bridgeport Mac store) told me about concealing my dark circles: only add concealer on the dark parts of what you're concealing, blend it and build as needed.  I have a few dark lines that almost frame my bags so I spend some time on that when I really want to hide them.
  4. I set my under eye make up with my Bare Minerals Veil.  I mostly use this since I don't have anything else, it is shimmery but since most of my eyeshadows I own are I feel like it's okay .. haha. Jacklyn Hill (from YouTube) used Mac Pro's "Emphasize" and I really like that and would love to get myself one but with it being fall and winter now I would want something not to white.  I do want to get something else to use for when I want a really matte look and not so glittery.  I did initially buy this for a highlighter but I ended up using it this way.  I also placed a little bit of this powder on my cupid's bow .. another tip I learned from Jacklyn.
  5. I bronze up my face by adding Mac's Bronzing Powder to the hallow of my cheeks and around my hairline.  I don't really "contour" my face but I do give it more dimension by adding the bronzer.
  6. When it comes to blushes I normally use one blush for a few months and then switch it up.  I bought Mac's "Blush All Day" back in September and I totally love it.  I told Christian exactly what I was looking for in a new blush and he handed me this one and I seriously love it so much.  All summer I've been using a bright pink so it's a nice change to still have pink cheeks but something better for fall. (In the past I've also used "Dame" and "Springsheen" from Mac as well.)
  7. I then powder the rest of my face with the Mac Mineralize Foundation/Loose.
After adding some bronzer and blush.
For my lips I used the Kardashian Nude Lip S"et "Au Naturel.  And that is it.  My look for staying at home all night long haha.  Next time I do a look like this I want to use "Fishnet" (Top left corner from the Urban Decay Deluxe) and take it more easy on the Zero.  
Again, here is the final look and then some close ups of the eyes.  I was experimenting taking photos and yeah .. not super happy about how they turned out but..whatever.  
 

Thursday, August 1, 2013

Courtney's Makeup Trial #1

One of my oldest and closest friends is getting married next month!  Courtney and I have been friends since we were 13 and along with Kristi and Lindsay she's one of my oldest friends and I have so many great memories with her and I'm thrilled she asked me to be in her wedding party and plan her bachelorette party.  She also asked if I would do her makeup for her bridal shower, bachelorette party and for the day of the wedding.  She said she noticed I have been getting into makeup and I'm excited she's letting me practice my skills on her.  She'll be the second person I've applied makeup to and oh crap, it's tough.  Haha.  I've done my sister Brooke's makeup a few times and then more recently for her prom which I was very pleased with how it turned out.  I'm getting used to doing makeup on someone else but it will definitely take more practice.  At this point the only issue I'm having is liquid liner and mascara.

Tonight I went over to Courtney's to do the first makeup trial.  The first look that came to mind for the wedding was a very flawless look with a light eyeshadow with a semi dark crease with no harsh lines.  I figured if anything this would also be a great bridal shower look.  I figured we would give this a shot and I'll do the look without her knowing anything I was doing and let her see everything when I was done.  Then next time I'll have her choose colors and give me some direction of what she envisioned and then the following time after that we would try something dramatic and fun (which would likely be for the bachelorette party).  And also for each time we would keep the foundation routine pretty much the same but fine tune it each time.

The foundation routine today was first a liquid foundation (I can't remember what it is at the moment, it's something she had in her makeup bag) which was a good one but I'm thinking I would want to try a bit more coverage foundation for next time.  Underneath the eyes I first put my new Maybelline Instant Age Rewind Eraser Dark Circle Treatment Concealer (in "light").  I got this the other day at Target (I think Gregory Gorgeous was the YouTuber that mentioned that he liked it but I honestly can't remember who it was for sure).  This was only my second time using it (once for myself and once for her) and I like it so far!
I also applied my Mac Prep and Prime (in "bright forecast").  And like always I LOVE THAT CRAP.  Seriously if anyone wants to gift me the two other shades I might love you forever...just saying!  Especially since the other two shades are lighter and one is a pink tone.  To set all of that I applied BareMinerals Mineral Veil.  It's a shimmery powder and while Courtney likes it shimmery I want to try a matte powder at one point to see how we like it.  I set her t-zone with a Mac face powder and then I slightly bronzed up her face with my Mac Bronzing Powder and used a bright pink blush from on one my IPSY bags for her cheeks.  Stephen and I agree that next time a bit more bronzer would be a good idea, I just didn't want to go all crazy this time around.  I also think it would be fun to try contouring a bit just to see how we like it.  But again, I don't want to go super cray with that but I still want her face to have dimension since so many photos will be taken that day.

Now for the eyes!!  And for those I have some close up photos of.  They were taken with my iPhone which actually photographed pretty well.  I've tried taking photos in the past of makeup and it's difficult to do!  I always wondered what cameras that girls on Instagram use but at that point..that's a lot of work.  But it's their careers so I guess it makes sense to have super amazing quality.  So I will say that in person it looks more pigmented and pretty much amazing. And I'll say again..this is like still all new to me, the whole putting makeup on someone else thing.  It's hard to know how to place your hands since you're used to putting it on one way and now it's all backwards.  I wasn't worried about the eyeshadow part, just the liquid liner and mascara.  And since Court is a pro at winged liner so she'll do that for this as well as the mascara.  I did it today to test my skills and so I can do the whole look without her seeing it until the end.  So please excuse the liner and the placement of the false lashes.  That was also a first for me, putting those one someone else.  But I'm pleased with what I was able to do.  Just takes practice.  I also shaped her eyebrows tonight as well.  She asked me if I could and I told her I would try (I JUST figured out how to do this on myself these past 6 months).  I thought I would at least remove the stray hairs and if I wasn't comfortable shaping them then I would stop and tell her to go get it done.  And holy efffff.  I did good.  Hahaha.  I was very surprised that I was able to give her a nice shape and to clean it up a bit.  I would still probably suggest her getting them done by a pro a week before the wedding so that way they're perf but again..these turned out pretty good.  Haha.
First I used Courtney's MaryKay eyeshadow primer.  I started with my Urban Decay Naked Palette and I had "sin" on the inner 2/3 of her eye but then thought it was too sheer and put "skimp" from my Urban Decay Mariposa Palette on and it was closer to what I had envisioned since it's more cream and matte.  Also from my Naked Palette I used "naked" for the transitional color for her crease, "hustle" for the outer corner of her eyelid and then "virgin" for her highlight and inner corner.  
The liquid liner is NYX and although you can't see it I put a black pencil liner on her bottom lashes and then slightly smudged with "hustle" with a small brush.  It looked pretty.  Promise!  Having it slightly smudged made it softer and not so harsh.  I really don't even liked describing it as "smudged" since I didn't lay it on thick.  I believe that's all I did today...I didn't fill in her eyebrows since they're already full and but I would go in and add a little bit of something next time.  I will for sure for sure for sure for sure use a setting spray for each of the events.  I currently have Urban Decay's All Nighter Spray which I'm close to running out of since it's a travel size and I use it like no other.  It's amazing how spraying your face with something like this once you're done with your makeup can really help it stay looking great.  I really want to try their Chill Makeup Setting Spray since I've heard great things about that one as well.
And I just remembered, the lashes!  Courtney got these at the Dollar Store!  Whuuuuuuuuuut.  They're the ones that crisscross and I prefer those the most out of all the styles and to apply these I didn't use any lash glue.  I just kept the sticky stuff on them and placed them on since we just wanted to see how it would look and didn't want to just waste them.  We'll use them on Friday when I go back over there to do her makeup for Stephen's birthday.  We'll also trim them at that point.

And then for the lips we decided a pinky/nude color would be best.  I only had bright pink, hot pink, coral and plum in my bag so I'll go pick something up.  I had the perfect lipstick/lipgloss combo that I got from Mac but I lost it!  The last time I saw them was on Easter and I have no clue where they are.  So sad.  And the worst thing is that I don't even have a clue what their names were.

So yeah that's it for this look today!  I'll be back there Friday and we'll put together more of a night look since they're going out that night so it's suitable for that and also to play around with things again.  So I may share that one as well!  I didn't have any plans to put together this post today but as I was writing the caption for these photos for Facebook I realized I should just write a post for it so I can put all the details and whatever.  I wanted to do this for Brooke's prom makeup but never got around to it but really, it was pretty similar to this but she has fair skin and no false lashes.